Car interior lighting. Car illumination with LED strip. Information before you start
Who doesn't want their car to look something special? This can be achieved in different ways, one of them is installing lighting in the car interior. Just imagine - you open the car door, and the interior is filled with light, like the cabin of an interplanetary spacecraft! Doing interior tuning with your own hands is not as difficult as it seems.
Decorative lighting for car interior
You need to immediately decide what kind of lighting in the car’s interior will be most attractive and what colors will be suitable. There are two options: neon lights and led strip.
LEDs on a flexible strip are extremely easy to install, their small size allows them to be used anywhere, they are sealed, impact-resistant and durable, but interior lighting is minimal.
Neon bulbs are difficult to install, capricious when switching on and off, and are very sensitive to damage. But the neon glow can illuminate half of the car’s interior.
The ideal interior lighting option: a combination of LEDs and neon. You can tune the dashboard with LEDs, and the floor with neon tubes. If desired, you can configure the operating modes of the LEDs. 
Neon lighting on cars
Do-it-yourself neon footlights in a car are easy to install and look unusual. For this you will need:
- a set of clamps for fastening;
- aluminum corners;
- self-tapping screws;
- neon lamps.
Step by step instructions:
- It is necessary to cut off the cigarette lighter connector from the lamps and strip the ends.
- Screw a piece of angle along the length of the lamp under the dashboard and attach the lamp to it with clamps.
- Repeat wherever neon lighting is planned for the car.
Attention! Near the rear seats, it is better to secure the corner upside down; in this case, the lamp will be better protected from damage. If everything is done carefully, the result will be only the light, but not its source.


The following power sources are used: interior lighting switch button, door opening/closing sensor and battery.
Advice: One of the wires can be connected to the throttle position sensor. Then, after flashing the engine ECU, the device will remind you that the lighting is installed in the car’s interior. This will protect neon lamps from voltage surges during chip tuning.
DIY neon interior lighting! Opening the car door, you can see the illuminated floor. 
Car interior decoration with LEDs
To work with LEDs you need to prepare:
- LED strip;
- wires;
- heat shrink tubes;
- single LEDs.
Advice: It is better to buy a factory model, because the one sold by the meter will have to be modified and connected via an RGB controller.
Step by step instructions:


Illuminating the interior handles is more difficult; the tools you will need are a screwdriver and a drill:
- First, the door trim and door handles are removed.
- You need to drill holes in the places where the light bulbs will be located.
- Insert LEDs into the holes.
- Connect power to them from the electric windows.

LED lighting in the car interior is ready! You can get into the car and check the intensity of the glow and the functionality of the car's interior lighting.
This is how you can customize the interior of your car without special skills and with your own hands. As a result, even an old, shabby car will look like a respectable foreign car from the inside.
LED interior lighting is more popular today than ever. In any salon modern car many different light sources. At a minimum, the cabin has a central light located on the ceiling, as well as a “navigator’s” light located at the front of the ceiling, in front of the windshield. In addition, in the car interior there may be lamps in the lamps located in the cosmetic mirrors, in the illumination of the glove box (glove compartment), in the trunk lighting, thresholds, footwells, etc.
For all these lighting devices, 95% of cars use two types of lamps:
- baseless lamps marked W5W (or, according to other classifiers, T10)
- soffit lamps marked C5W/C10W (or, according to other classifiers, festoon)
But even with the two most common types of lamps, it’s not surprising to get confused, since our catalog of LED car lamps contains more than 20 models of each type. Let's try to figure out which models LED lamps suitable for the interior of your car.
1.2.
3.
4.
Base type
Choosing LED lamps for car interior lighting is not difficult. On home page In our store, select the make and model of your car, then open the “interior lighting” subsection. If you did not find your car in the catalog, or the “interior lighting” subsection for the car model you are interested in is not filled in, then choosing LED lamps for interior lighting yourself will not be difficult.
The most reliable way to find out the type of lamps used in the lamps of your car is to open the lampshades and remove the standard lamps. If you see that the lamp is entirely glass with a flat base about a centimeter wide with metal tendrils, then you have a W5W baseless lamp:
The power of this small incandescent lamp is 5 Watts, and its luminous flux is approximately 50 Lumens (data on the characteristics of incandescent lamps are taken from the catalog car lamps Osram company). To replace this outdated incandescent lamp in all respects, you can choose a modern, brighter and more efficient LED lamp in the section.
If you see a lamp with two metal cones at the ends, then this is a soffit (aka double-ended) lamp.

For this lamp, it is important to measure the distance between the extreme points of the bases. If the length of the lamp does not exceed 37 mm, then it is a lamp marked C5W, the power of such an incandescent lamp is 5 Watts, and its luminous flux is approximately 45 Lm. If the length of the lamp is more than 37 mm, then it is a C10W lamp, its power is 10 Watts, and the luminous flux is about 100 Lm. On our website, the length of C5W lamps is indicated by the last number in the name of the LED lamp. That is, for example, the F-4s50f31 lamp has a length of 31 mm, and the F-6s50f42 lamp has a length of 42 mm. You can select lamps of this type in the section.
If the lamp is a glass body with a cylindrical metal base, then it is a T4W lamp:

The power of such a lamp is 4 Watts, the luminous flux is about 35 Lm, you can choose a replacement for it in the section.
Space inside the lamp
Once the required type of lamps has been determined, it is necessary to inspect the interior lamp itself. When choosing LED soffit lamps C5W Pay attention to the length of the lamp, as well as the space inside the interior lamp. If there is not much space around the standard lamp, such as in this case:

then it makes sense to choose a narrow lamp.
If there is enough space and a wider LED lamp can fit into the interior or trunk lamp, then you can install wider and much brighter lamps.
LED lamps larger size provide uniform light over the entire area of the lamp, good illumination of the entire area of the diffuser, that is, they solve the familiar “light point” problem.

The lamp in which it is installed baseless LED lamp W5W, can be of different shapes and sizes. The first thing you need to pay attention to is the location of the lamp inside the lamp. If the lamp inside the lampshade is located parallel to the plane of the diffuser, i.e. in other words, sideways, as in these photographs:


It’s better to stick to side-illuminated LED lamps, for example:
In this case, the entire luminous flux of the lamp will be directed in the right direction, and will not illuminate the walls of the interior lamp in vain, as in this photo...

In addition, it is important here to evaluate the space inside the lamp and, if possible, choose a larger LED lamp for better illumination of the entire diffuser. A good example of choosing bright LED lamps for interior lighting:

In the case when the lamp in the lamp is located perpendicular to the surface of the diffuser, and the space inside it is very limited, as, for example, in this interior lamp:

And if there is enough space in the interior lamp, then you have the opportunity to choose: install small LED lamps of a more or less standard size, as shown above, or install larger, slightly unusual LED lamps like these:
possessing high brightness and giving a magnificent effect of bright, diffused light.

Lamp brightness and color
Besides external form and the size of the LED lamp, it is necessary to take into account its purpose, that is, where exactly the LED lamp will be installed and what it should illuminate.
Navigation light lamps are designed for reading, for example, a road map in the cabin. This means that there should be enough light in them for reading, but at the same time, the light should not be excessive so as not to blind the eyes. For reading, it is better to choose a white or naturally white glow color. The optimal luminous flux in this case is 100-150 Lm.
The central interior light creates general lighting inside the car. It is logical to install a white LED lamp with the maximum luminous flux in it, so that there are no dark corners in the cabin. But if you are not a fan of classic solutions, then you can install colored LED lamps, for example, or make blue, red, green or even pink light in your salon, which looks very unusual.


The light in cosmetic mirrors located in sun visors should not be too bright, because when using the mirror the lamp will shine directly into your eyes. Comfortable luminous flux in this case is 25-70 Lm. In this case, the lamps should illuminate the face well, which means the light should be pure white.
The lighting of the footwell area, glove box and trunk should be such that not a single detail gets lost in the depths of the car. Here you can not skimp on the light and put the brightest LED lamps in these usually small lamps:
The bright light of these LED lamps will be especially useful when searching for a dropped phone or lipstick in the glove compartment.
LED lighting for doors or thresholds performs two important functions. Firstly, it illuminates the space in front of you when you get out of the car, and secondly, it indicates in the dark open door, making it more visible to other road users. In the lamps located in the doors, you can install LED lamps of any color and brightness to suit your taste.


Ready-made lamp sets
As you can see, when independently selecting LED lamps for the interior, you need to take into account many nuances. If you don't want to bother yourself with lumen flux indicators, markings and lamp configurations, then opt for one of the more than 100 ready-made sets of LED lamps we have, made specifically for a specific car model.
The lamps in this set exactly replicate the interior space of the interior and trunk lamps of this car, flood the lamp diffusers with light as evenly as possible, and in addition, have dimmers and a lifetime warranty! You can select a set for lighting the interior of your car in the section.
Clause 3.1. Traffic regulations prohibit operation vehicle, if “the number, type, color, location and mode of operation of external lighting devices do not comply with the design requirements of the vehicle.” But you want, oh how you want to give your car some personality traits, including through the play of light and shadow. Meanwhile, you can engage in lighting design without coming into conflict with the law. Changing the interior lighting is not prohibited by traffic regulations, and today we will tell you how you can illuminate a familiar interior.
Ceiling lamps
When people talk about interior lighting in a car, the first thing that comes to mind is ceiling lights. They are the main sources of light in the dark. Many have probably already replaced conventional incandescent lamps in lampshades with LED ones.

And they shine brighter and consume less electricity, and therefore can burn all night almost without draining the battery. The main thing is to choose a shade of color that suits you best. True, until recently, these same shades had to be selected in advance, because they could not be changed during use.

But now RGB lamps have appeared on the market, capable of changing both the color of the glow and its strength. To do this, the delivery kit includes a remote control with which you can set these parameters. Such lamps are connected to the lampshade using special adapters, which eliminates the need for soldering or twisting power wires, and the “light bulbs” are attached to the lampshade using double-sided tape, included in the kit.

It remains to add that such a set of two LED panels and a remote control costs about 300 rubles, and the car’s interior looks very impressive in their light.
Foot lights in a car

At one time, this option was considered chic: floor carpets were illuminated only in business and executive class cars. But over time, such a useful feature migrated to simpler cars. And those owners who did not have such lighting in their cars began installing it themselves. True, not everyone is well versed in electrics, and not everyone will undertake to introduce an additional lamp into the interior. Solve the problem little blood A set of four lamps will help, just for each of the seats in the cabin.

They are secured in the right place with double-sided tape, and are powered from the cigarette lighter socket. All that remains is to lay the wires so that they are not very noticeable, and you can enjoy the light in your feet.

A set with a fixed color costs about 400 rubles. A set of lamps that allow you to change the color of the glow will cost around 1,500 rubles and comes complete with a wireless remote control.

By the way, models with a Wi-Fi module are not much more expensive, but they allow you to control the light from a mobile device using a special application.

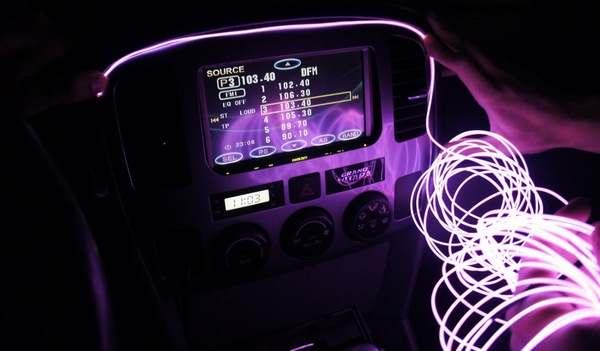
Machine contour lighting

This type of interior lighting remains one of the rather expensive options today if you order it at the time of purchase. new car. Thanks to it, the luxurious interiors of premium cars become even more magnificent at dusk and at night. Light guides installed in certain parts of the instrument panel and door trim create an indescribable atmosphere; you just have to activate this option. And the ability to change the color of the glow allows you to set the mood for the entire trip. And it would be naive to believe that the enterprising Chinese will not start producing inexpensive kits that will allow you to turn it into a salon Mercedes-Benz S-Class even the interior of a shabby Zhiguli car.

The kit is a light guide, powerful LED, a driver for connecting it to the car network and a set of wires. The light guide is placed in the joints of the parts of the instrument panel or trim, after which an LED is inserted into the end, the power of which is supplied to the side lights. With this connection, the lighting will delight you when external lighting devices are turned on, and not just when the doors are opened. A kit with a pre-selected LED color (there are about 10 of them) and a two-meter light guide will cost 400 rubles. If you want to change the intensity and color of the backlight during operation, then you can’t do without a set with an RGB light source.

A set of a 5-meter light guide and a wireless control panel costs about 2,000 rubles, which is still several times cheaper than the cost of such a feature as an option.
Instrument panel lighting

The instrument panel is also very often the subject of design in a car. Some people are not satisfied with the standard backlight color, others think the brightness of certain icons is insufficient, others want to make the dashboard multi-colored, for example making the speedometer area above a certain speed red. Upgrading the instrument panel has now become much easier. To do this, just order a set consisting of 40 LEDs of different colors, and the instrument cluster of your car will sparkle with new colors.

The LEDs already have a corresponding base, so you don’t need a soldering iron to install them in the instrument panel. You will only need to remove the corresponding light bulb and insert a new light source in its place. However, it should be borne in mind that before putting the instrument panel in place, you need to make sure that the LEDs are lit.

If they are inserted incorrectly, that is, the polarity is not observed, they will not burn. Although they are light-emitting, they are still diodes, and a diode only passes current in one direction. The set costs about 500 rubles.
Internal car tuning is very popular. And this is understandable, because any driver wants his car to impress not only pedestrians and other drivers, but also those who ride in the same cabin with him. And sometimes, you just want to please yourself with individual car interior lighting.
Installing lighting in the car interior with your own hands is not a difficult procedure. To do this, you need to purchase high-quality material and prepare tools, as well as think in advance about what exactly you want to emphasize with the help of light.
How and in what places is LED lighting most often installed? What is the effect, from an aesthetic and functional point of view, of additional LED lighting? You will get answers to all these questions in this article.

Before starting work, you need to choose a place to place the interior lighting, its type, and also take care of the activation mechanism. For example, appliances and/or door opening mechanisms can be controlled by remote control. The best option is a combination of devices.
Today the market offers us two modernization options:
- Purchase of LED strip.
- Installation of neon lamps.
There is a clear advantage to first lighting a car's interior. This is the ease of installation of the tape. There is no need to purchase additional mounting hardware for installation. The LED strip included in the kit is simply attached to double-sided tape. Lamp standard sizes can be powered by a cigarette lighter and illuminate other small parts of the interior.
The positive properties of diodes include shock/strength and high tightness, as well as long-term operation in comparison with other interior lighting devices. It is important that the car's LED lighting turns on instantly. This allows you to create different lighting effects.
You can also create neon lighting for the car interior yourself. This will be a bright light, with the help of which a large space will be illuminated. Unfortunately, neon-based lamps are technically complex devices, and also very capricious in their operation. Neon lighting often burns out when constantly turned on/off, and is highly fragile.
Do-it-yourself installation of neon lighting in the car interior

Practice shows that it is best to start installing neon car interior lighting from the floor. We are preparing nylon clamps, an aluminum corner, neon lamps and self-tapping screws.
We cut off the connectors for the cigarette lighter and strip the ends. We prepare the corner, adjusting it to the size of the lamps, using pre-prepared clamps. We mount it under the interior dashboard. The driver's footwell is now illuminated.
Thus, we install additional lighting anywhere in the car interior. We hide the connecting wires under the mats, directing them to the dashboard from the driver's seat.
The wiring joints are insulated. The kit is connected to the door sensor and/or interior lighting switch. You can use the battery as a power source after removing the wipers.
Having finished the work, the wipers are installed back in their place. Now, before opening the car doors, a pleasant surprise awaits its passengers - pleasant neon lighting.
How to properly install an LED strip for car interior LED lighting?
Installation of a car with LED strip is carried out according to the standard scheme. First of all, you need to purchase a set of wires, heat shrink tubing, and tape.
It, like individual diodes, is purchased at automobile markets and/or in specialized automobile stores. You should not skimp on the quality and length of the tape; experts advise stocking up on good LEDs. It’s better to buy more diode strip than to realize at the last moment that you don’t have enough.
In addition to interior design, diode strips are actively used to illuminate car wheels.
Step-by-step instructions for diode connection of car interior lighting
Arrangement of lighting in the car, with your own hands, should begin with the instrument panel of the vehicle. To do this, standard equipment is removed: instruments, panel lighting, and diodes are installed. The installation process is very simple, since the diodes have bases similar to factory equipment.
Then you need to determine the installation locations. Many people prefer to mount diodes along the entire perimeter of the ceiling, parallel to the car body pillars. The summer is laid gradually, and the remains can be cut off.
The cut points are clearly visible: they are marked with special membranes. After the procedure, do not forget to clean the ends of the cut and solder them together. We close the connections with bushings and heat them with a hairdryer. In this case, it is better not to use an industrial hair dryer, since there is a high risk of overheating; an alternative is a regular household appliance.
Switching on is carried out similarly to the circuit of neon lamps. You need to be especially careful at this moment and not confuse the polarity points that are indicated on the tapes at the cut points.
Essentially, this is where the workflow ends. There is nothing complicated. Only the installation must be carried out sequentially and be careful about small elements when connecting them.
An important aspect when working is the combination of lighting aesthetics and its functionality, which will be discussed below.
Aesthetic and functional components of lighting in the car interior

Vehicle interior lighting, which is done on your own, simultaneously solves a number of problems:
- a unique design of the interior of the car is created;
- The car stands out from the background of standard interior equipment with its originality and functionality.
Determining the functionality of lighting in a car interior is often somewhat more difficult. For many cars, installing additional lighting (tuning) is an opportunity to create comfortable conditions for passengers and the driver at night, which include:
- Installing the backlight in the car with your own hands can significantly simplify the search for objects in the car interior, be it gloves, water, mobile phone etc.;
- Getting into the car turns into a kind of ritual, rather than a standard, ordinary action. A useful and pleasant addition is to turn off the lights after closing the car door and smoothly reduce the brightness of the standard lamp;
- The ability to easily and simply find objects on the floor in the cabin;
- Speaking of the illuminated handles, this means they can be found quickly and make it easier to get in and out of the car.
It is also worth mentioning that the interior lighting can be synchronized with the subwoofer installed in the car's interior. This gives a lot interesting moments, in particular, pulsating light to the beat of music, changing the color of the backlight, etc.
We can talk for a long time about useful functions, but we will focus on the above combinations.
Design aspect of lighting in the car interior

It is important to choose niches for car interior lighting and decide how to illuminate them. You can place and make lighting in the car interior in any place you like. But do not forget about the practical side of the issue. The most successful is the installation of lighting in the glove compartment, in the foot area and in the rear of the car, where passengers are located.
It's interesting that the lighting rear seat most productive. This applies to accessories and individual parts, including door handles. Car interior lighting as decor will look effective on air duct grilles and/or around the entire perimeter of the doors. You can combine directional light, or its individual elements, using a cigarette lighter or other electrical on-board network.
You can limit yourself to one-time activation and/or connect on an ongoing basis after dark.
There are no clear recommendations on the use of one color scheme or another. However, the lighting in the car interior should be “polite”, that is, not irritate passengers, not be in the eyes, etc.
The main thing is that the chosen color does not distract the driver from driving, and corresponds to the general concept of the car’s interior.
What tools and materials are needed for additional interior lighting?
Using one or another version of car interior lighting, you will need the most ordinary tools and consumables. Including:
- Scissors;
- Soldering iron;
- Pliers.
From consumables:
- Solder;
- Rosin;
- Tips for “screw”;
- Wires of the required length;
- Locking button or toggle switch.
In operation, individual lighting components must be connected to each other using a multi-core cable. In this case, the useful area of the cores should be 1–2 mm. Those places where soldering occurred, as well as connecting contacts, must be covered with insulating material. In the process of verification and control correct installation To illuminate the car interior with your own hands, you need to use a multimeter.
What do you need to know about car interior lighting with cold neon?
You can add individuality to your car and make it stand out from the general flow of traffic using cold neon, which looks original and is very effective. Today, neon lighting is one of the most common methods of interior tuning. This option has the following advantages:
- minimal energy consumption. Neon is considered a practical option due to its long service life. Transparent material does not lose its original characteristics and does not fade. Despite its strength, it bends easily and cuts well when creating different light combinations;
- neon thread can be mounted in different parts of the car interior: on the pedals, dashboard, handles for opening the door and/or glove compartment;
- cold neon does not distract the driver from control traffic situation and is considered a safe material for our vision;
- the light of flexible cold neon is distributed, evenly saturating the interior, which is very convenient in the dark and at night;
- When operating, do not turn on additional lighting devices, including standard equipment.
Do-it-yourself car interior lighting using cold neon is not only beautiful, but also practical. Such tuning allows you to protect you and your passengers, and provides a huge field for imagination.
By making lighting in the car interior with your own hands, you can get a single color light, or in different colors. color scheme, using different patterns, colors and combining their quantities. Installation with neon material is a minimum cost and minor interference in the electrical system of the car, which does not affect the stable operation of other (standard) vehicle systems.
Car interior lighting - a new option
We are talking about laser illumination, which appeared here relatively recently, gradually winning the hearts of car enthusiasts and chip/tuning specialists. For example, when you open a door, after installing laser illumination in its lower part, on the ground in front of the door, the logo of your choice is formed. This is what it looks like in the photo.

Let us help you personalize your car different ways. Some people reupholster the interior themselves, while others try to attract attention with homemade spoilers. But most often, do-it-yourself interior lighting makes an unforgettable impression on others.
The lights can burn statically or blink to the beat of the music playing in the cabin. You can experiment in different ways, the main thing is to use the necessary durable materials. Then there will be no need to frequently redo the circuit or its individual components.
When the car interior lighting is manufactured and installed, you can select methods for activating it. Contacts coming from the door opening sensor are used for automatic on/off. You can also use the remote control remote control to turn it on at the right moment for the driver.
Light strips are placed around the perimeter of the opened door, under the feet of passengers, in the places of standard lighting devices, along the instrument panel, inside the trunk, as well as in other desired areas of the cabin.
Materials used
High-quality car interior lighting is distinguished by the competent and appropriate use of lighting materials. The most popular light sources are LED and neon lights. Let's look at the characteristics of both light sources.
LEDs:
- often used due to its ease of installation;
- most blank materials come with the ability to be fixed using a built-in adhesive strip;
- each LED takes up very little space and can fit harmoniously into the internal area of standard lighting;
- The mounting strip with LEDs is made of durable material;
- LEDs have a long service life;
- quick response when starting allows them to be used as light and music.
You need to know that before installing additional lighting of any type, you must disconnect the battery from the network.
Neon lamps:
- neon lamps have a bright, unusual light;
- at correct operation service life may be longer than LEDs;
- adapted for use in static conditions, without rapid on/off cycles;
- sensitive to mechanical stress;
- Installation takes longer than LEDs.
Neon lighting design
Do-it-yourself beautiful lighting in the car interior will be made using combined elements. For example, decorate the lower part of the interior with neon lamps, and decorate the side and top with LEDs. However, there is no need to overuse this design element. Everything must be arranged in such a way that harmony is created.

You need to know that excess and a large number of colorful lights look tasteless.
We will select materials for installation of both types of additional lighting. You can start from the lower part of the cabin, where neon lights are installed. For installation you will need:
- a set of several neon lamps;
- aluminum mounting bracket;
- plastic clamps;
- screws for fixation.
A standard sold set of neon lights for a car often has a built-in plug for connecting voltage through the cigarette lighter socket. For this operation it is not required, so you can select a set without it or cut off this plug as unnecessary, and strip the ends of the wire for connection in the circuit.

We measure the length of the aluminum corner for mounting it under the dashboard, saw it off to the required length and screw it at the bottom. Usually installed first under the glove compartment. We fix the lamp on the clamps, directing the future radiation in the desired direction. We repeat the operation in the driver's area and in the rear passenger seats.
The corner at the back should be placed in such a way as to protect the lamp from impacts and accidental pressing. To do this, the corner is fixed with the free edge up.
The ends of the wires are extended, insulated at the connection points, hidden under the upholstery and brought under the dashboard for connection to the circuit. The simplest option is to connect it to a door opening sensor or to general lighting. It is worth adding a separate switch for additional lighting into such a scheme.
Design of additional lighting from LEDs
Interior lighting using LEDs begins with the preparation of materials. The two most commonly used types of tape are RGB or SMD. The second option will be a little more expensive, but easier to work with. Additionally, you can select single LEDs for dedicated zones, but more meticulous car owners are already working with them.

To replace standard lamps, LED analogues with the same base designs are suitable. In other places the tape is applied. Before installation, you need to measure the required length of the strip and cut the required piece of tape at fixed points. There are usually hard spots in the belt for the chain to break. It is by them that the length must be divided. If you do not cut according to the specified marks, then there will be no contacts to which wires are soldered for further wiring.
The tape is usually distributed along the dashboard, along the entire perimeter of the roof and down the pillars of the doorways. Fixation is carried out using double-sided tape attached to the LED line on the reverse side and covered with a protective strip. We tear it off and fix the LED strip.
You need to know that when working with LEDs, you must strictly observe the polarity, otherwise they can be damaged.
We solder wires to the open ends of the LED strip and cover the connection with shrink film. After heating the soldered area covered with film using an industrial or household hair dryer, close the contacts from oxidation. Next, we bring out the ends of the wires in the same way as with a neon connection.

When using RGB tape, you can assemble the circuit using an RGB controller.
Conclusion
Installing polite lighting in the car interior does not take much time. If you have all the tools and materials, you can spend several hours on installation. As a result, the car will become more attractive and receive individual features.
 Lesson-study "Morphology
 Russian Church Slavonic dictionary online
 List of manual operations in 1 from 8